- Locating the File Manager
- Navigation
- Editing a File
- Copying a file
- Moving files and folders
- Drag onto the parent directory
- Use the Move button
- Decompressing a compressed file
- Compressing Folders and Files
- Compressing an individual file or folder
- Compressing multiple files or folders
- Uploading a file
- Downloading a file
- Deleting a file/folder
The file manager is best used for quickly editing text based files or uploading small files. It’s also the main location where you’ll archive (compress) and extract your files. To make the most out of your server it’s important to understand what the File Manager can do for you, and what it can’t. You’ll find some walk throughs of the main features of the File Manager below.
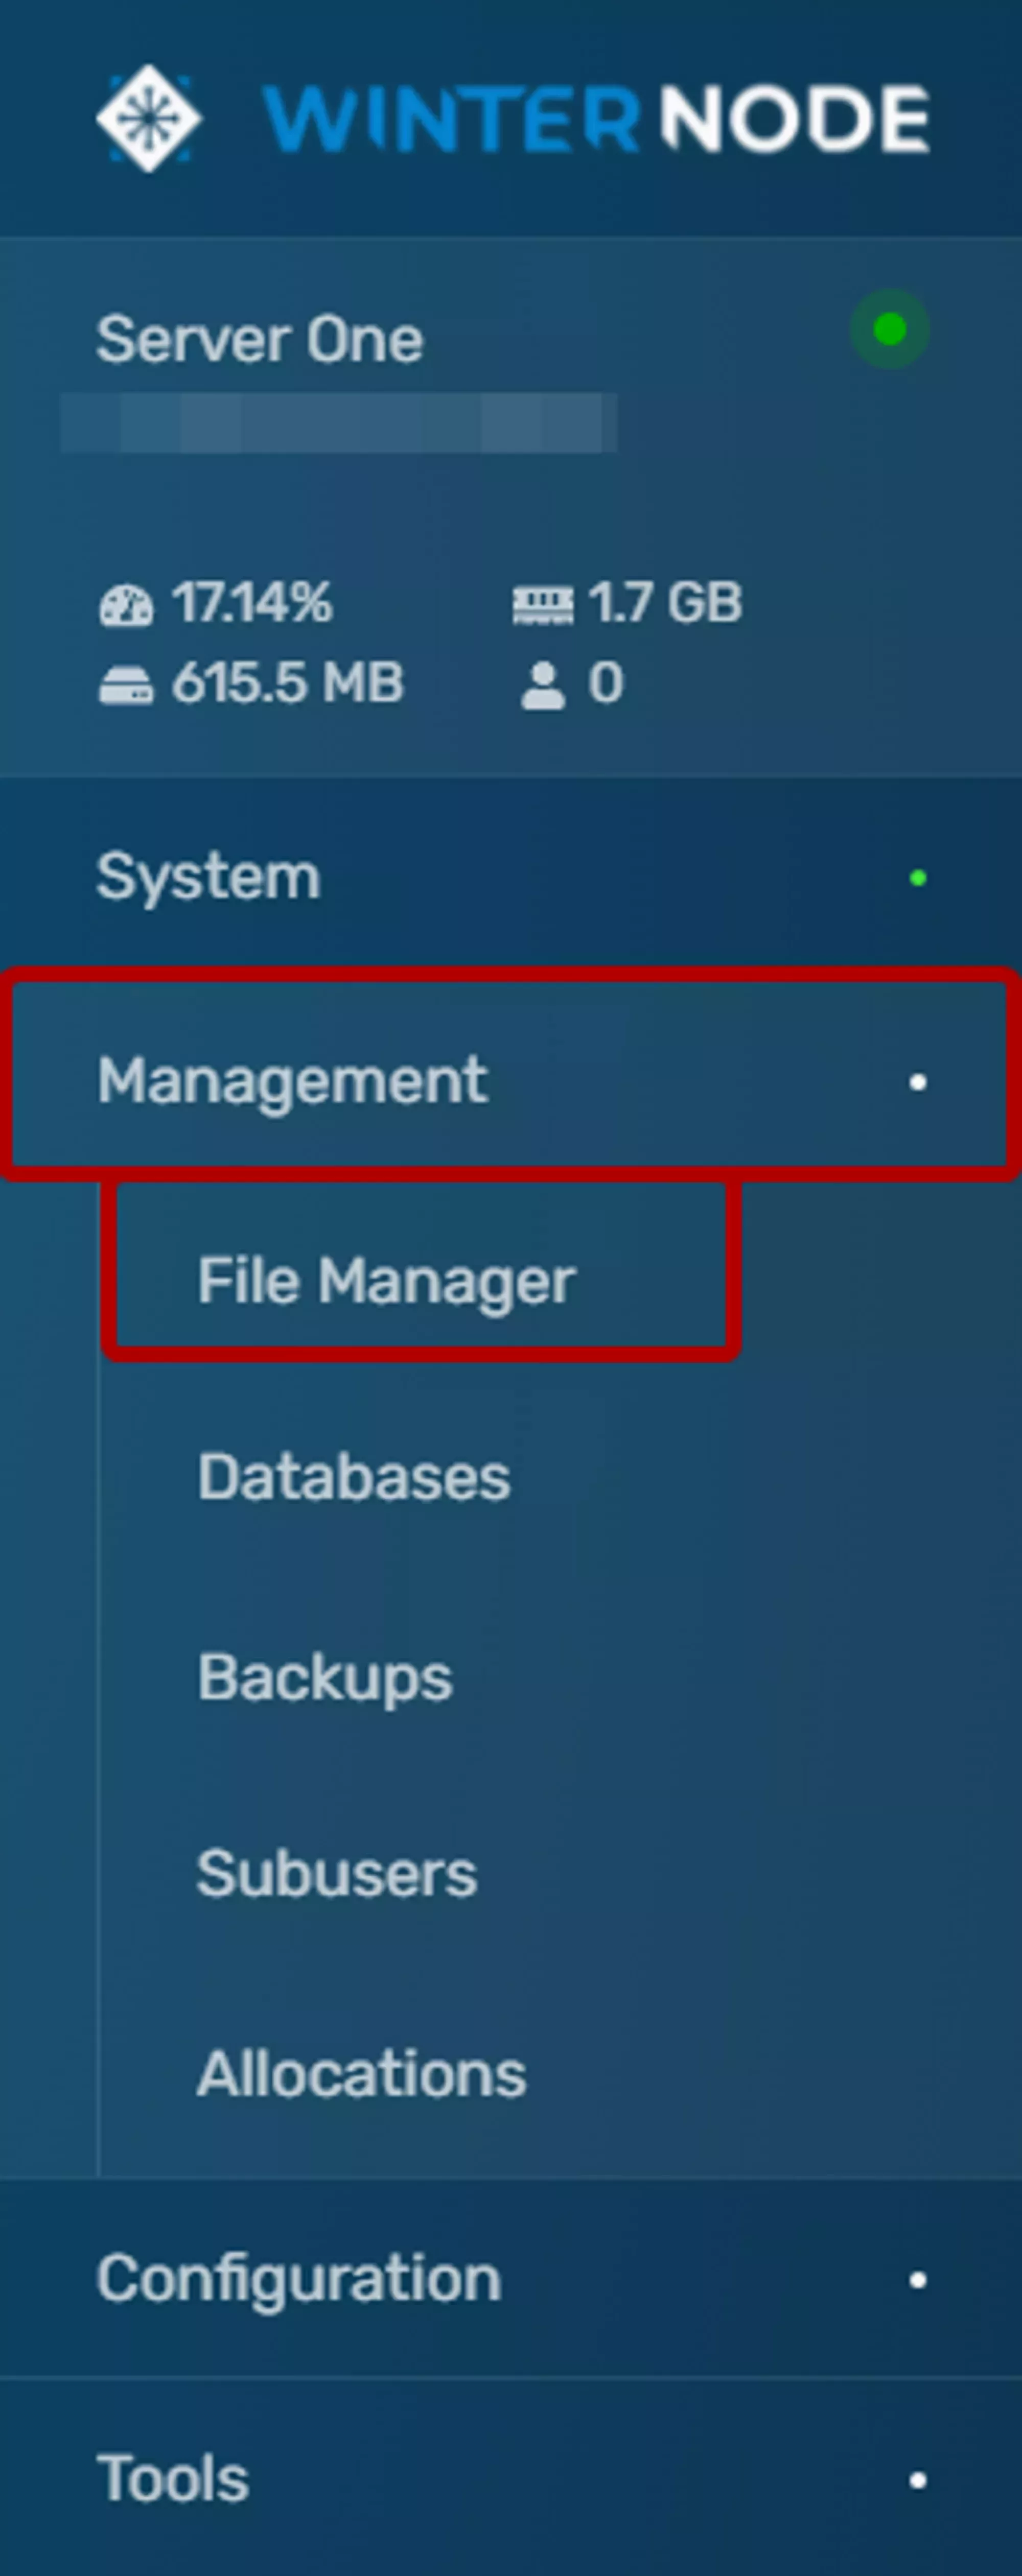
Locating the File Manager
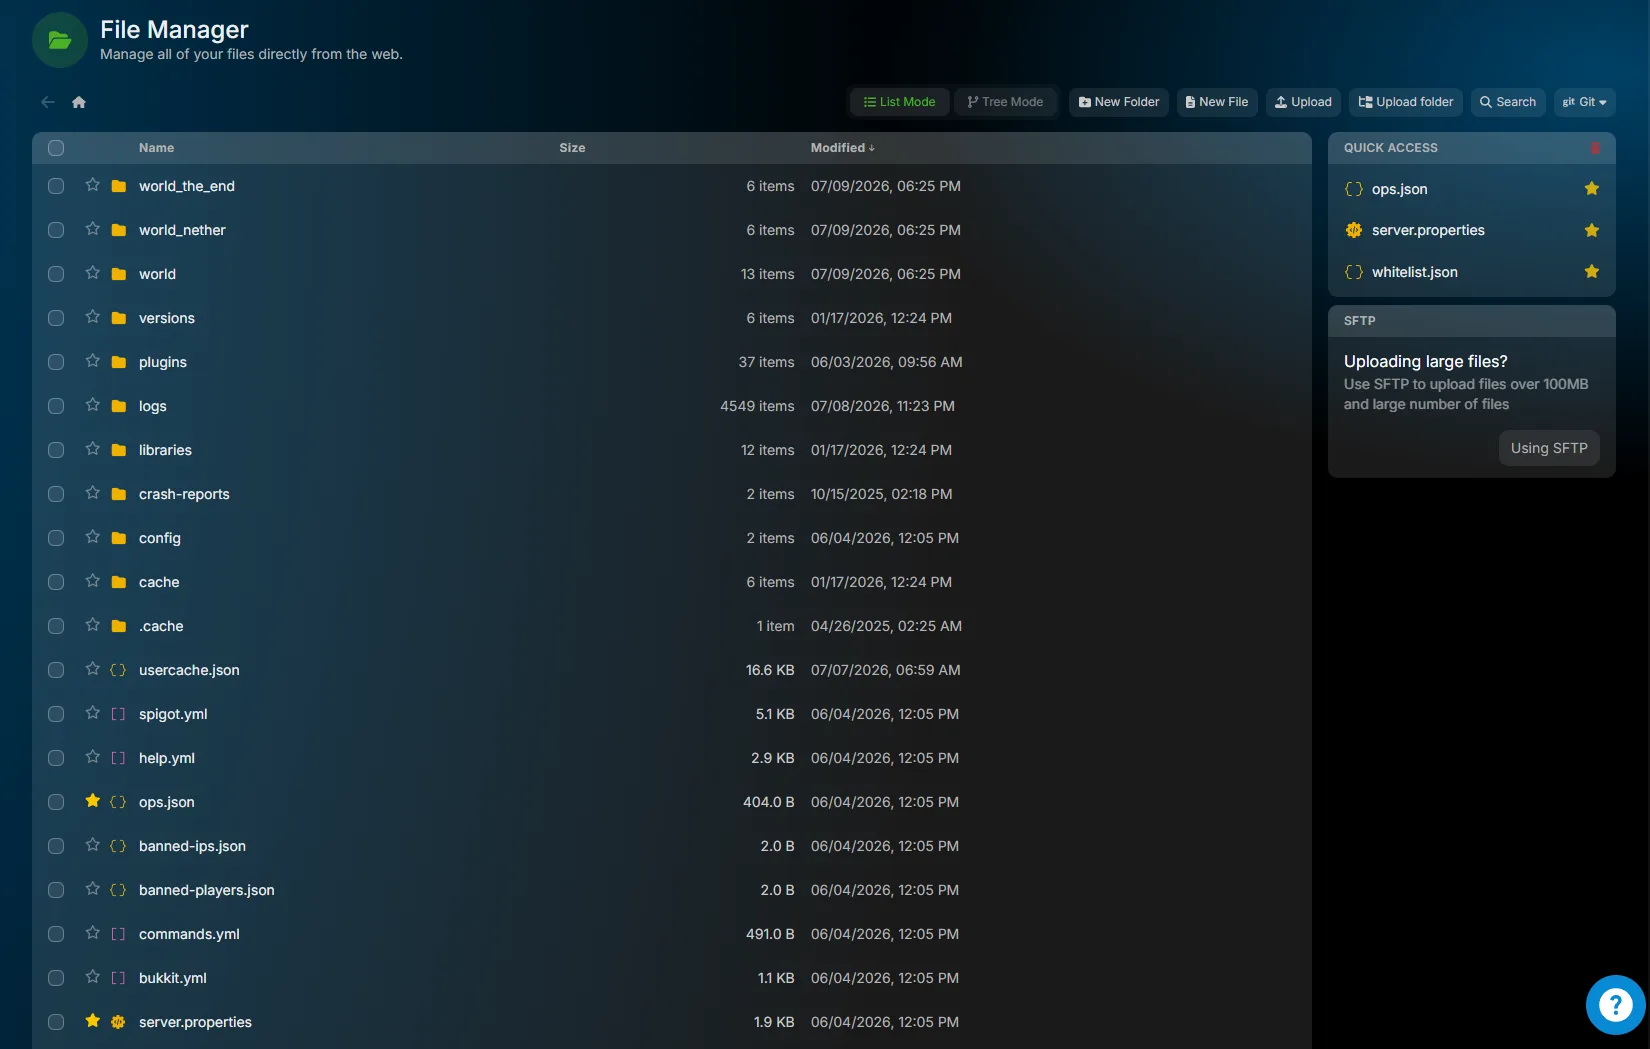
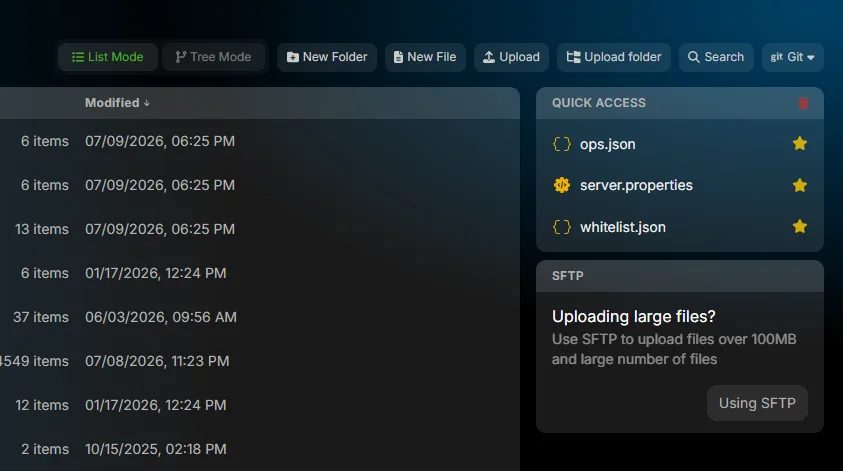
The File Manager is at the top level of the sidebar, between Console and Server Options, as seen in the image to the right. Once there you’ll be taken to your server root and should see the all of the files currently located on your server.
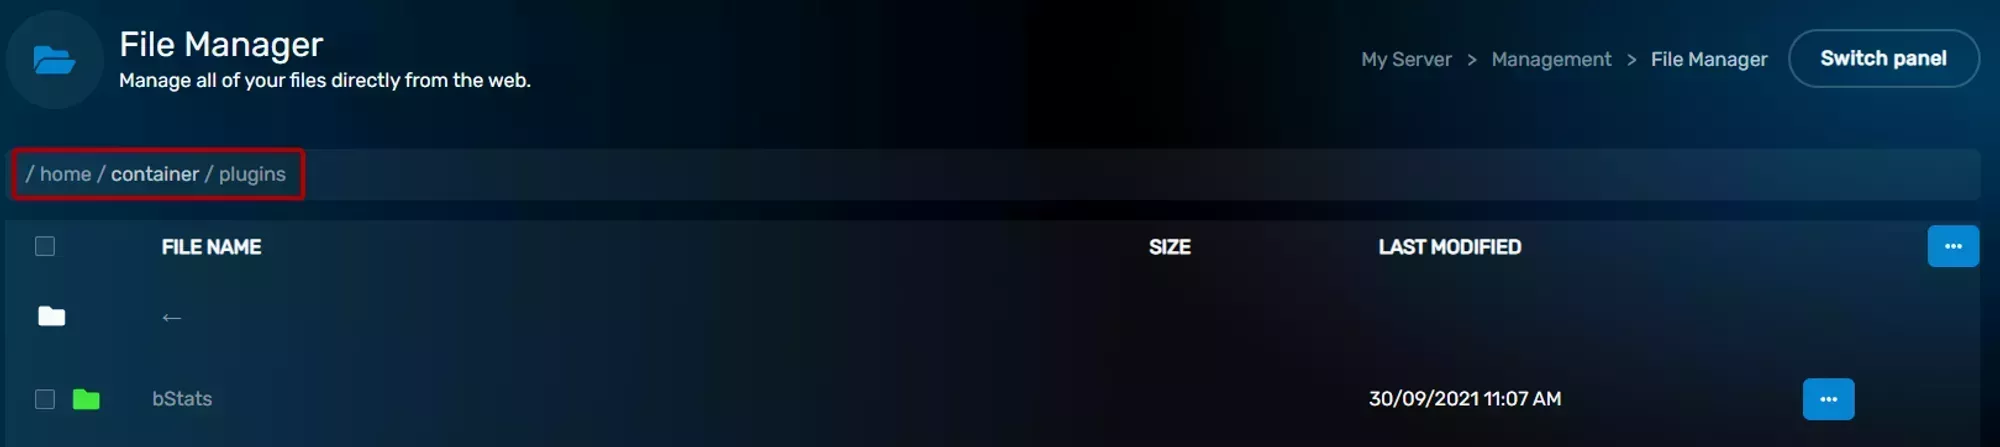
Navigation
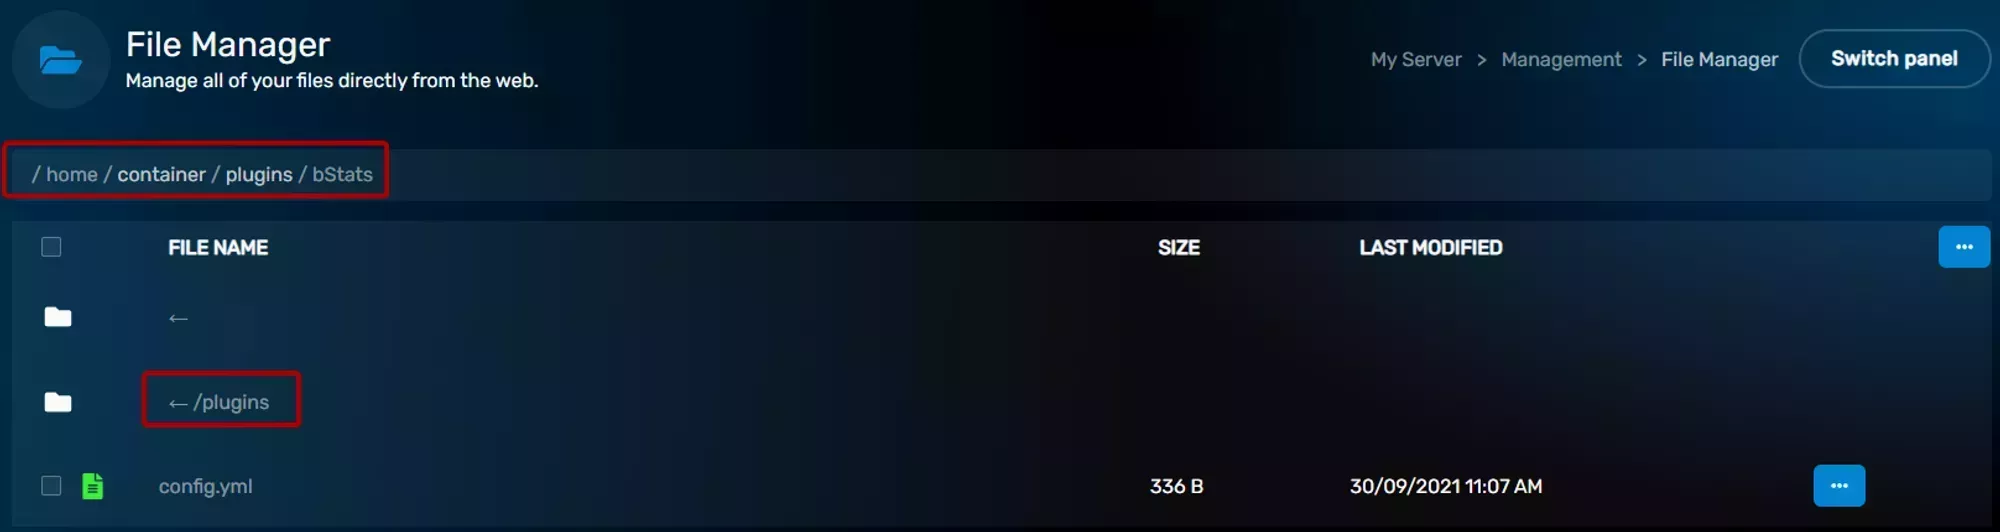
The File Manager displays the current file content of your server and allows you to navigate through the directories it contains. You can enter a Directory by clicking on its name in the File Table located in the center of your screen. When you enter a Directory it will be added to the breadcrumb path at the top of the page as seen in the image to the right.
If you need to navigate back to the Directory above your current one, select the .. parent directory row at the top of the file list.
If you need to navigate back to the Server Root at any time you can click the home icon at the top left of the File Manager. Your Server Root will always be /home/container so you can double check your location using the breadcrumb path at the top of the screen.
Editing a File
To edit a file navigate to it in the File Table and the click on its name. If it’s a file that can be edited as text then you’ll be sent to a basic text editor. You can easily edit your file from here and use the save button on the bottom right of the window to save your file. Once you’re done editing you can use the Return to File Manager button to return to the directory that contained the file. There are some QoL keyboard shortcuts that might make editing your files a little bit easier. You’ll find a list of them below.
Shortcuts
| Shortcut | Action |
|---|---|
| CTRL+SHIFT+D | Duplicates the current line to the line below. |
| CTRL+D | Deletes the current line. |
| CTRL+A | Selects the entire file. |
| CTRL+S | Saves the current contents of the file. |
| CTRL+X | Removes the selected content from the file and places into your paste buffer. |
| CTRL+V | Places the contents of your paste buffer at the text cursor position. |
| CTRL+Z | Undoes the last action. Includes parts of typed text. |
| CTRL+SHIFT+Z | Redoes the last action that was undone. |
Copying a file
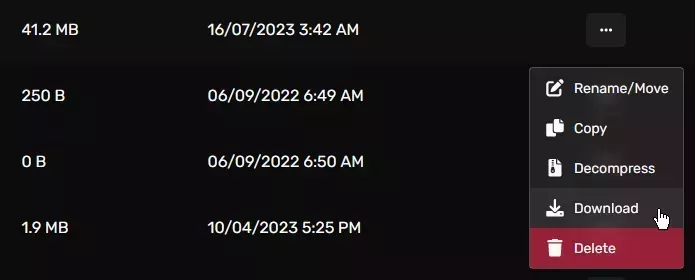
You can copy, or “duplicate”, any file on your server using the File Manager by clicking on the kebab menu on the right side of the file entry and clicking copy. After a few moments, you’ll see a new file with the name of the file you copied and the word copy followed by a - with the UNIX timestamp of the time it was copied. For example, a file named testFile.txt would be copied as testFile.txt copy-1674676225
This can be a great way to make a quick backup of a file you’re working on. However, you can’t copy folders at this time, but you can compress them by following these steps.

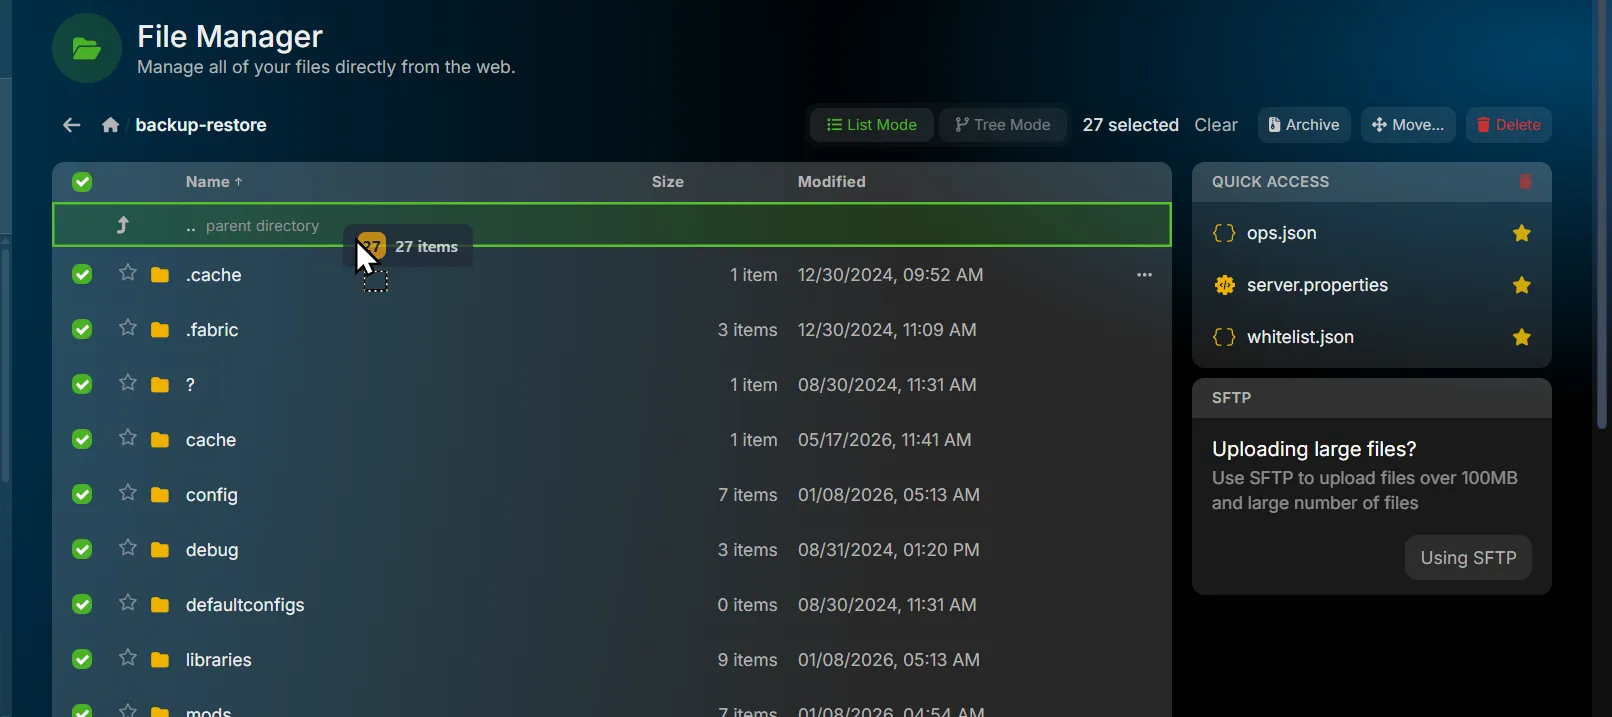
Moving files and folders
You can move files and folders without compressing them first. This is the quickest way to relocate a batch of files, such as moving restored files out of the /backup-restore folder and into your server root.
Drag onto the parent directory
- Select the files and folders you want to move using the check boxes on the left. To grab everything in the current folder, click the check box at the top of the Name column.
- Drag the selection onto the .. parent directory row at the top of the file list.
- The selected items move up one level into the folder above.
Use the Move button
Prefer not to drag? With your files selected, click the Move… button in the toolbar and enter the destination path. Enter / to move everything to your server root.
To move a single item, open its context menu with the … button on the right side of the entry and select Rename/Move, then type the new path. The path includes the file or folder name, so moving the world folder into your server root means typing world.
Decompressing a compressed file
After uploading your compressed file to your server Using SFTP you need to decompress it by following the steps below.
- Locate the file you uploaded on the File Manager
- Click the 3 dots on the right side of your file
- Select Extract
- Ensure that the files you wanted are now in the correct location!

Compressing Folders and Files
Compressing a folder allows the folder to act as a single file and decreases its size at the same time, while compressing an individual file will only decrease it size. In both cases, programs such as game servers, plugins, mods, or software won’t be able to interact with the files or folders as they normally would, so being able to compress items is primarily useful to you as a user rather than the server.
You can use the web file manager to compress files/folders individually or in bulk.
Compressing an individual file or folder
You can compress a single file or a folder containing multiple files by following the steps below.
- Locate the file or folder you want to compress
- Click on the ellipsis menu on the right side of the item
- Click the Archive option

Compressing multiple files or folders
You can compress multiple files/folders into one archive by following the steps below
- Locate the files/folders you want to compress.
- Select each file/folder using the check boxes on the left side of the items.
- Click the Archive button in the toolbar at the top of the File Manager.

After archiving finishes you’ll find a new archive file named with the date and time it was created. For example, archive-{date}.tar.gz
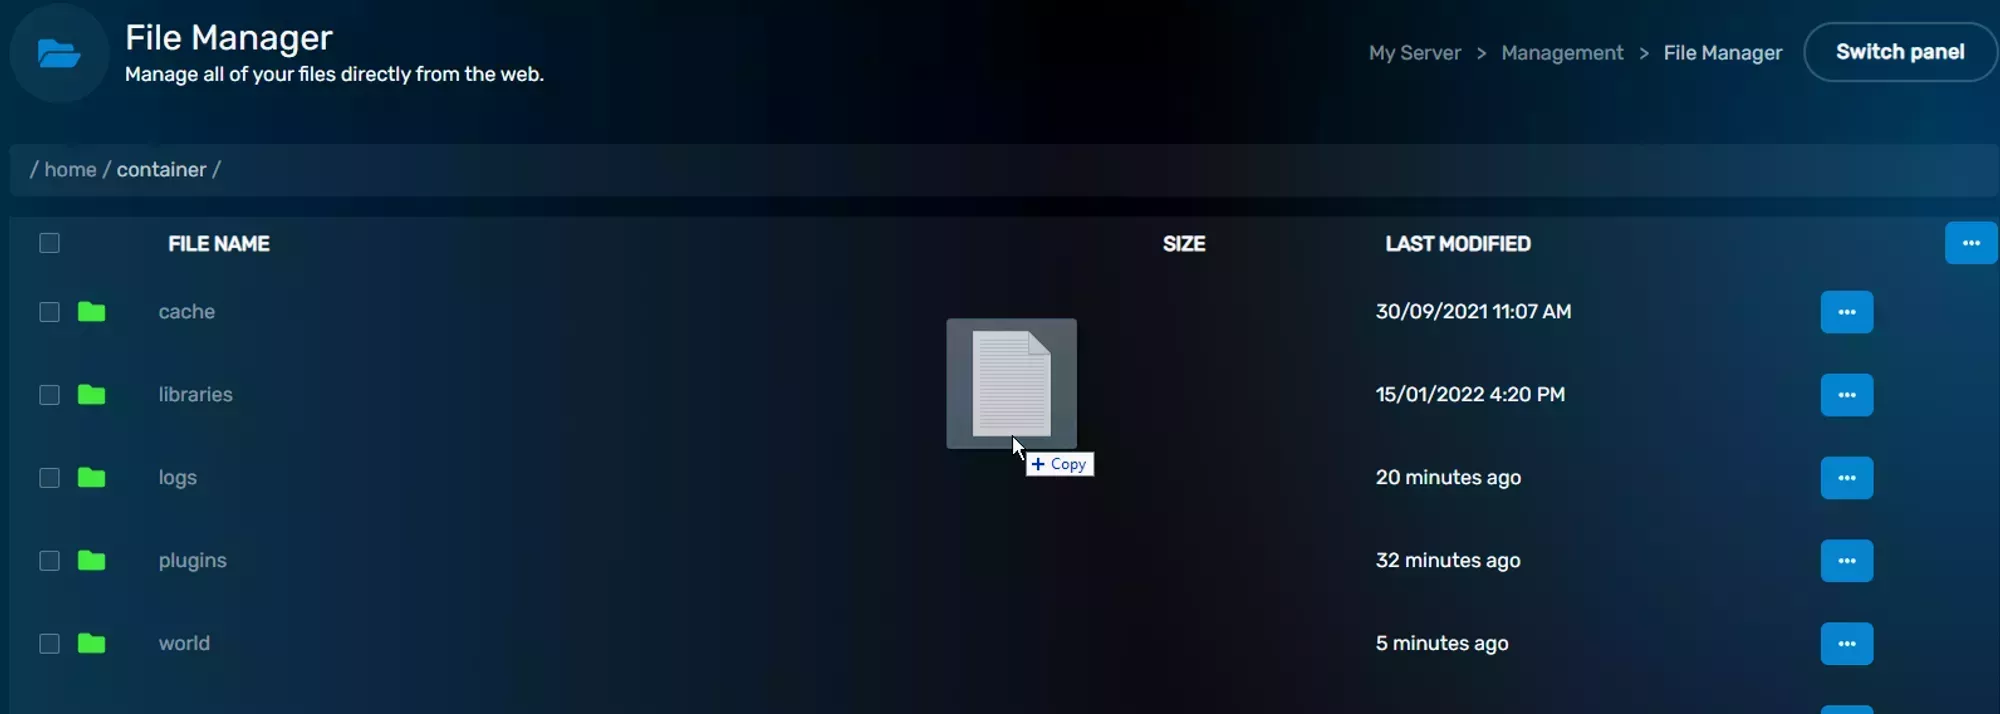
Uploading a file
You can upload files directly from the File Manager by either dragging the file into the File List, as you can see in the image to the right, or by clicking the Upload button in the toolbar, which will open a file selector. The Web Based File Manager has an upload limit of 100mb, so if you need to upload a file that’s larger than 100mb you need to use SFTP. If you’re not sure how to use SFTP, then check out our Using SFTP page.
Downloading a file
You can download a file from the file manager using the context menu for the file that appears after clicking on the ellipsis on the right side of the file entry and selecting the Download option. The file will be downloaded to the default download location for your browser.
You can download multiple files at once, or a folder, by either compressing the files you want to download, or individually selecting them for download using the ellipsis on the right side of the file entries.
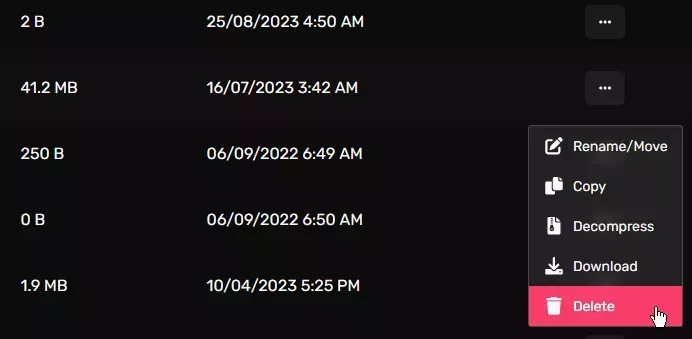
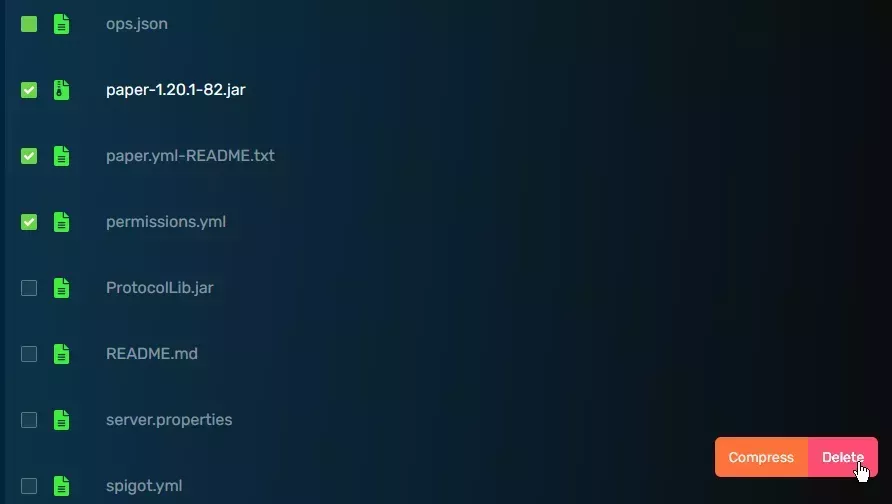
Deleting a file/folder
You can delete a file or folder by using the context menu that’s opened with the ellipses on the right side of the file entry, or delete multiple files or folders by selecting the files/folders you want to delete using the check boxes on the left side of the entries and clicking the Delete button in the toolbar at the top of the File Manager.